
This post includes affiliate links. When you purchase through these links, we may receive a small commission at no extra cost to you. For full details, please see our affiliate disclosure page.
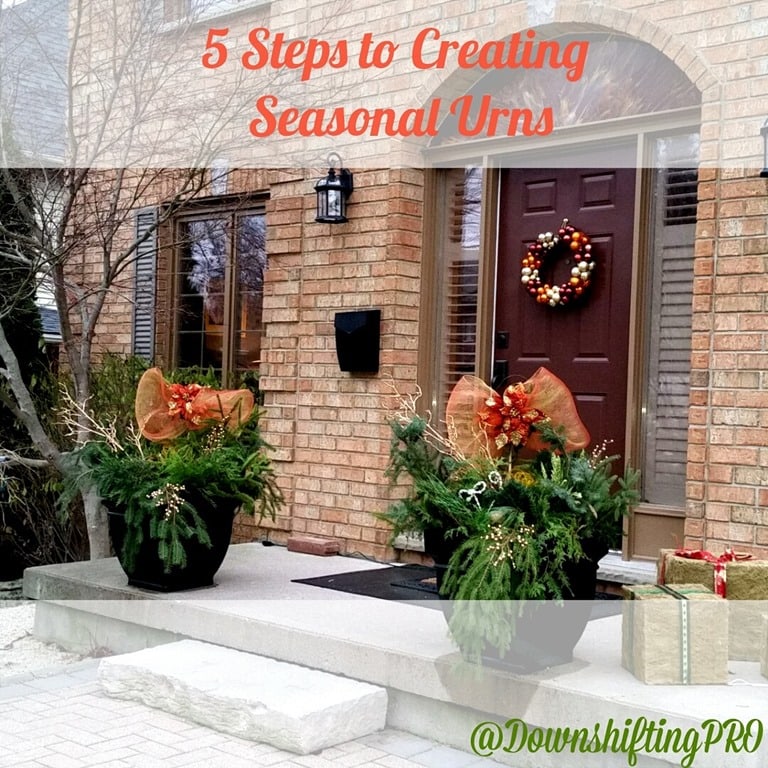
Every single year my mother and I make up my seasonal outdoor urns. In the late spring we set out the summer container planters and in the late fall early winter we set out the season outdoor urns. I have had these containers for almost ten years now and I know that they have to have a fair amount of greener to make it work. My mother always anything small gets lost on this big landing. I have to agree. I’m rethinking the wreath (but is is one of my favourites – I have a few). To begin this project, we make sure to keep the clipping from the evergreens, cedars and Cyprus on our property. She also goes to our City of London Envirodepot where people deposit their fall clippings, there she collects a huge selection of greenery.
🏡 Where to Stay: Top Accommodations
🥾 Explore: Tours & Experiences
🚙 Hit the Road: Car Rental Deals
🛫 Get Away: Find Flight Deals
🎒 Shop: Travel Essentials
I love this part of our project: (1) she is recycling what people are throwing away (and will be composted by the city); (2) it is way cheaper than going to a nursery for bundles of clippings and (3) you get a much wider variety of greenery to choose from.
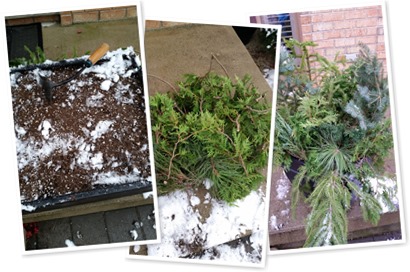
It is easiest to do this project during the fall but creating something interesting on your front landing for those long winter days is always a nice visual treat when it is all snowy and white. You can do not have to have a ‘Christmas’ theme. You can also have more of a winter scene or a woodland theme. I just wish someone had chopped up some birch branches that I could have added. Besides, now is the perfect time to add to them as a lot of the seasonal items are 60 – 75% off so you can save some money too. Although, these particular urns were completed before the holiday season, they will be left out until the spring.
Creating Seasonal Outdoor Urns
Step One
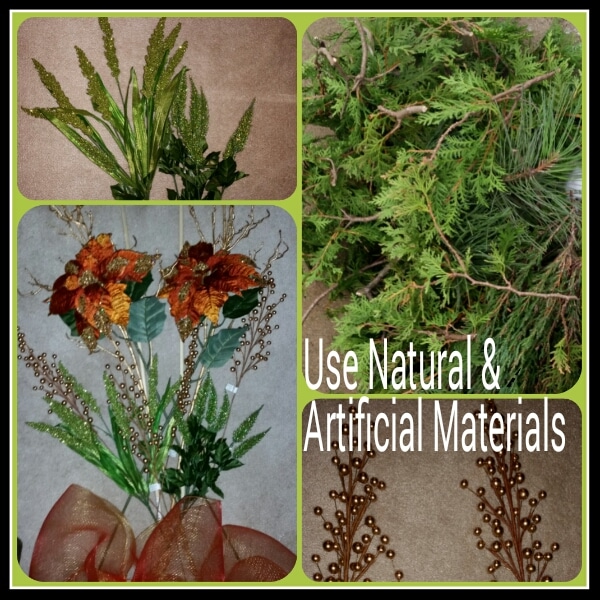
Select a good variety of evergreens that will stand up to frigid cold weather. You want pines, cedars and cypress cuttings. You can also purchase holly or large magnolia stems from Michaels or Hobby Lobby.
Step Two
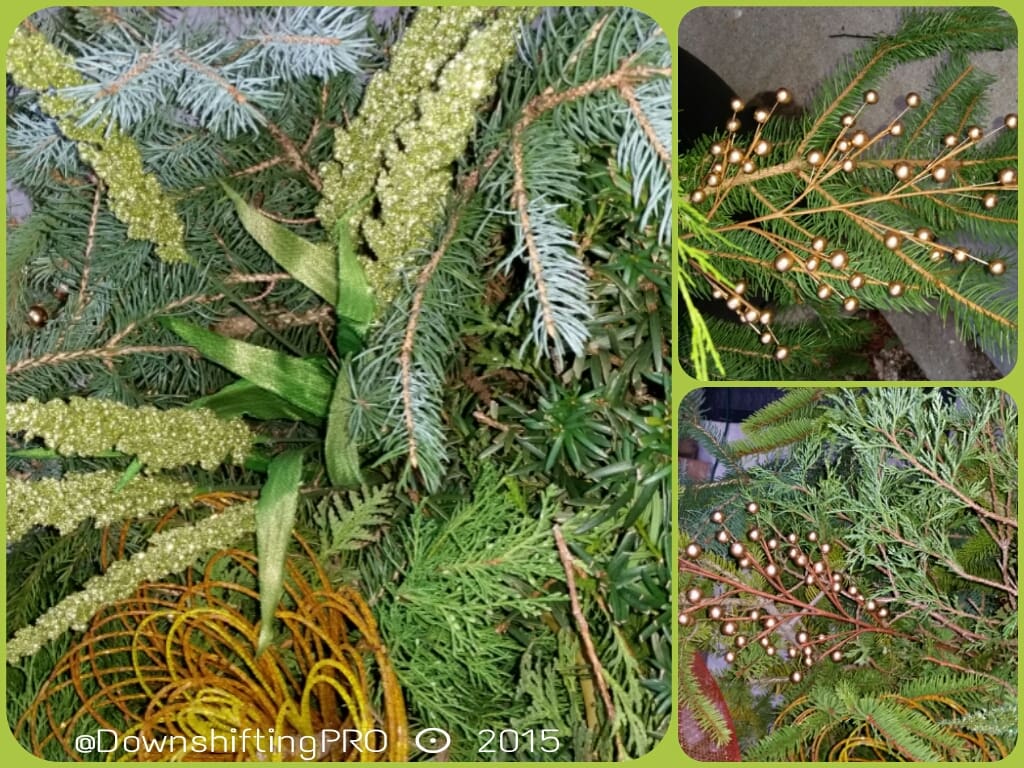
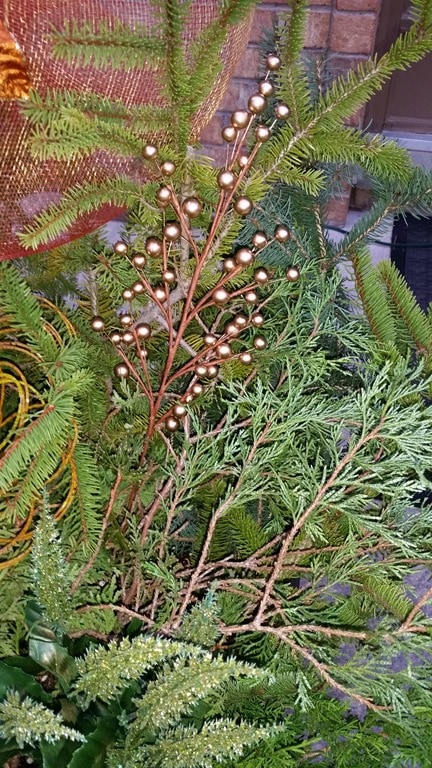
Purchase a few choice artificial elements for variety, durability and colour. I bought some long golden stems that seemed to be very sturdy indeed. Plus, there is glittery greenery and stems that are painted in metallic colours. I also bought elements that were both long and short. In order to get more variety, get similar colours but varying in intensity.
The different textures just add greater depth to your containers. It permits you to play with a variety of looks until you get the right combination. That is what we had to do so that each element added to the overall look. It also meant that there was not to much of one thing and not enough of another.
Step Three
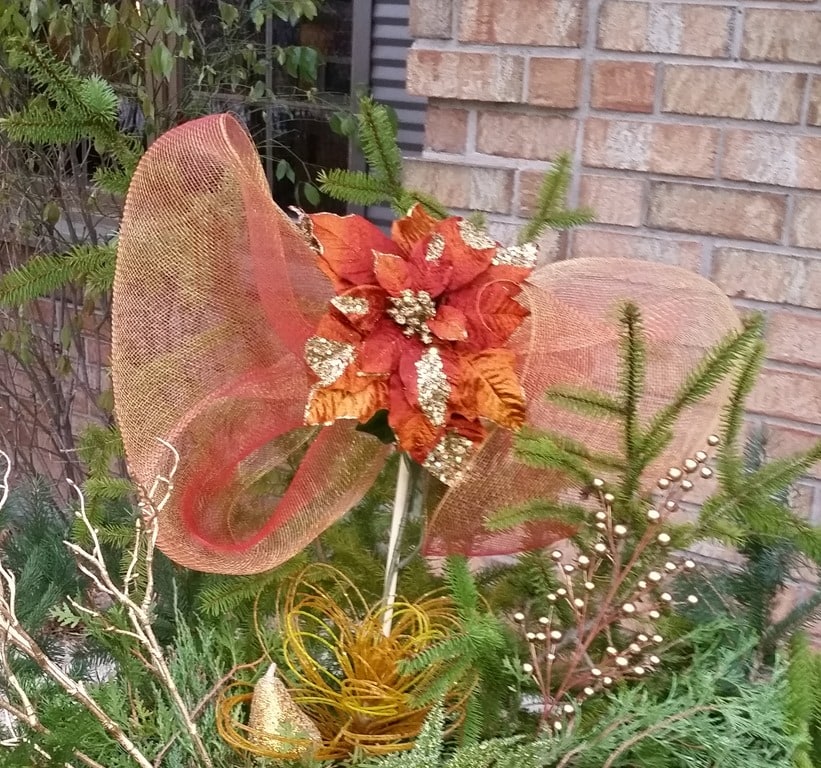
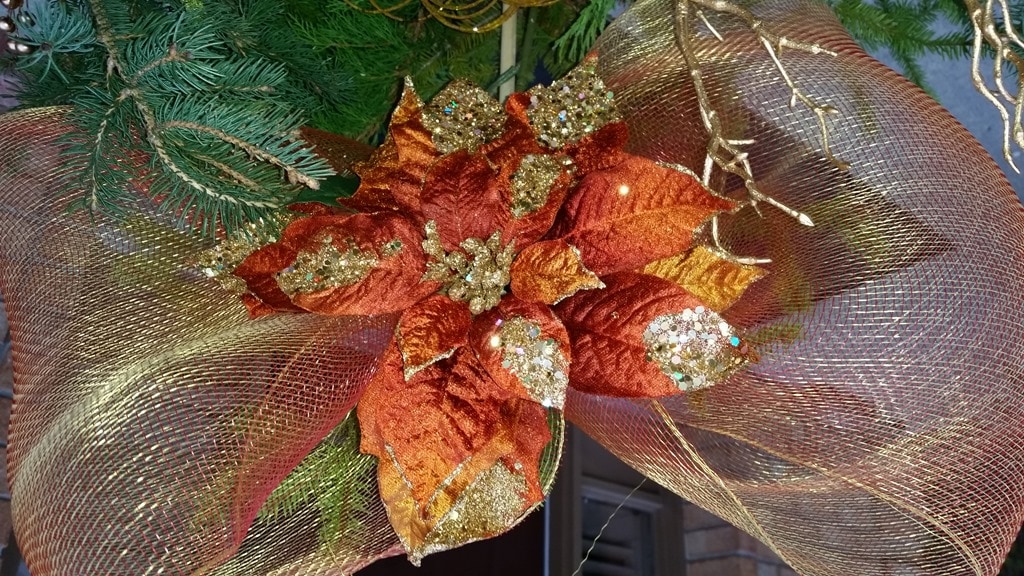
Add one focal point. It can be a combination of a few items but you need for them to be interesting and it has to stand out. Left to on its own, this flower arrangement is almost gaudy. But when I added it on top of the mesh fabric bow, it looked gorgeous. I used a copper coloured mesh fabric that would compliment the colour of my front door. I wanted something that would stand out and catch the light during the day but sparkle at night when the lights were on.
We secured both the bows and the flowers on with zip ties. I purchased a fairly long and thick dowel to support the decoration. The longer the dowel, the deeper it will be implanted and the stronger it will be as it braces those winter winds. We have almost lost those big bows twice before but have managed to retrieve them just a little way along the street. This time, I am making sure those zip ties are secured correctly to a strong dowel.


Step Four
Make sure to stagger the greenery. Some high, some low. It may seem a bit wonky at first but there needs to be a bit of drama and that does not happen if everything is the same height.
Step Five
We have two urns or planters that we usually decorate. I like both of them to look similar but they may have a few different elements. This just creates a more interesting combination but it does not make them so different that it looks wrong. Once you have made them you need to make sure to place them in the right location.
We have had these on the main porch or below on the lower step depending on the season. In the fall we may still have our two chairs out but once the holiday season arrives (as well as more snow), we have other decorations on the landing.
Now all you have to do is step back and admire them from afar. Not just to give yourself a pat on the back but to make sure that they are even and that they are facing the right way.
There is nothing nicer than a welcoming seasonal outdoor urn. Whether it is summer or winter or fall. It is nice to add flowers or greenery to your door. We finished up the whole entry way by adding a larger outdoor mat and then placing a smaller mat on top of that. In the picture you can see how it defines the landing. I am happy to welcome visitors to our home and I hope they enjoy seeing the winter greenery as they approach the door.
🥾 Explore: Tours & Experiences
🏡 Where to Stay: Top Accommodations
🚙 Hit the Road: Car Rental Deals
🛫 Get Away: Find Flight Deals
🎒 Shop: Travel Essentials
What a Creativity! Love it
This is something my granny would find amazing. She loves anything DIY, especially when it’s something to do with beautifying her home. <3
Great DIY. and this time it’s easy. anybody could just do it
Potted plants and flowers could be arranged every two months; from the inside to the outside and vice versa.
I love the urns that you have outside your door! They are always beautiful year round. Great DIY post!
This sounds like it would be such a beautiful display outside of the house. I love the idea of using greenery that can be recycled.
I like your final products. I would probably change the bow to something else more my style. But this is a very good idea on how to make these decor. Thanks.
This is an amazing idea and it looks so gorgeous. It looks so easy to do with your step by step instruction.I would love to have seasonal outdoor urns but here we get to much snow for them. This one would be nice for fall thought too. Thanks for sharing.
Nice . I also saw a project where they used chipped/ broken terracota pot and decorated it with succulents.
Your urns are beautiful and I’ve picked up a few tips I will use in the spring time. I love big urns, but usually fill them with fresh flowers that have a short lifespan. I love your idea better.
Thanks for sharing your do it your on urns, i must show this to my mom and hopefully she can make it the way you do. 🙂
I love the use of clippings thrown away by other households, help you save while helping the environment! Your arrangements looks lovely.
This is an easy way to make a seasonal urn to refresh the look of the house. It also leaves a lot of room to creativity.
Awesome tips! I found some that were really inexpensive but sadly my children broke them within a day of them coming home. Anything outdoors must be child safe so that they’ll withstand the abuse.
Never think only 5 steps i can do it! Thanks for sharing such great tips.
What a great DIY project indeed! Totally a lot of benefits from doing your own stuff than buying from the stores.
These turned out fantastic. I have the perfect spot by my door to put one.
This is a very helpful tutorial. Outdoor urns do make a house look beautiful.
These are gorgeous. I worry about doing stuff here in Michigan for my front porch or even the back one for fear the snow and ice will ruin them.
Diy projects are so fun!!! I love these!!! Way too fabulous 🙂
Wow, those are so pretty. I never thought to do that for my porch.
Chinese New Year is coming soon. I will try to do something like that. Thanks for sharing this.
These look fantastic! I never thought of doing something like this for an outdoor or indoor project. Looks very nice.
That is lovely! I’ll make one and put it near the fireplace. I love me some greens inside the house.
great tips! But it’s suitable for people living in houses and not flats and apartments! 🙁 I love how you make use of the wild instead of buying them!
This is something that I’d really like to start doing. But probably not until we move.
Wow… lovely. Great talent you got there.
Wow.. Love this. You really got the talent. Thanks for sharing.
I like the way you broke it all down to explain it. I think it’s great, a visual delight!
We have a couple of outdoor planters that we have no idea what to do with in the winter. This is really beautiful and I am going give it a try. Our front door needs it. Thanks.
it looks fun and pretty! i’ll have thought it’s a real pot of flower plant actually. perhaps if we can use only artifical material, we can do without maintenance works totally!
Great tips, I always forget to decorate outside but I’m sure my seven year old won’t let me forget this year!
This looks really lovely! I wish I had the time to start a few projects like this. My balcony needs a bit of love 🙂
I really love to decorate, crafts and this is fantastic, you did a great job, thanks for sharing.
what an amazing idea!! I currently don’t have a place to put an urn yet, but when I do I want to make these!
I love DIY projects. This one is so pretty and looks simple. Definitely trying it soon. Thanks for the great tips.
Wow! Those outdoor urns you made truly look gorgeous. I’m happy to learn that they’re so easy to put together. This would be a fantastic project for anyone looking to decorate their yard 🙂
I truly have no idea such beautiful decor is so easy to make!
What creativity! That is such a lovely door design! Hope I can make one too!
This is such a creative idea for outdoor decorations. They look great and everyone can put their own spin on them.
Outdoor urns really aren’t a thing here in the UK but I love them and try and make little door decorations instead. Over here, they would get swiped!!
I love your URNS! The shape and size is PERFECT. Then your DIY project really spruces up what could be pretty boring in the winter. I also think you need a bigger wreath. But otherwise you have a great eye.
Michelle you are so right. I actually bought a bunch of Christmas balls to make a new one for next year. I hope to feature it on the blog. 🙂
Those are really beautiful. I love all projects that are DIY. Those flowers look very gorgeous. I love what you have done!
Oh I have always wanted to do this! I may do it this year because this post makes it do able! I love this!
These look wonderful on your front porch! I live in an apartment so it would have to be an inside urn for me–except I have a cat who LOVES to dump things over.
These turned out beautifully! I could definitely use something like this on my front porch.
These are such a great outdoor decoration! These would look great on either side of my front porch!
I love this post and your urns are fantastic. I bought a ready made one this year and it is still going strong. I think it is great that your Mom does these too. And recycling makes sense. I wouldn’t have thought of this actually with the clippings from your own yard. Good choice.
Looks like a very fun DIY project.. Things like this my kids enjoy doing.
I love these tips, and I love what you did with your urns. You have a great eye!
I’ve never had an urn before but these are so cute! I love how you incorporated the outdoors nature in it! They’re adorable and I’m going to have to show my mom these!
This is great! I’ve been kicking around the idea of urns, but I never really got into gear on it. This will certainly help me with that!
I just love these! I’ve been meaning to get some for our home (every Spring) but never get around to it! It makes such a difference!
Those look so wonderful! I wanted to create some this Christmas but never got around to it. Thanks for the how to!
These looks so beautiful and simple enough to do. I love how they look expensive but are affordable
OMG I was looking for a diy like this. Something that shows me a before rather than a pinterest after. This looks lovely. I will definitely be trying this out.
Those are great tips for sure. My mother has a few things like this on her front step – I will tell her about the one focal point.
These are great ideas. I often forget to decorate the outdoor.
I love DIY projects! I’ll have to try this one out sometime. I find your instruction easy to follow and the pics are really helpful.